Summer Carbonara, Fluffy Pancakes, Tomato Orzo & Garlicky Broccoli
letting mood guide your food (plus, embracing boredom + celebrating everyday moments) ✨
Allô! 👋
Even though it's only been just over a week since fall's official arrival, people here have been acting as though the season started a month ago. I can see why — it wasn't even September yet and already leaves were turning red and the air was getting noticeably colder. Most salient for me, however, was the return of the night sky.Â
Like most Canadians, I'm a southerner. At around 45°N of longitude where I grew up, the sun never rises earlier than 5AM and always sets by 9PM. Here in Southern Norway, at 60°N of longitude, the sun sets so late and rises so early in the summer that we don't technically get any nighttime between late April and the end of August.
What this means in practice is that the winter days are just as short as the summer days are long (sunrise at 9:20AM and sunset at 3:20PM, anyone?). And, somewhere in between, the transition happens rapidly. We're currently losing daylight at a rate of more than 5 minutes per day, which means that while at the start of August the sun was getting up at 4:50-something, by tomorrow it won't be up until 7:20-something.
All this to say, it's getting dark here. Fast.Â
And to combat dark days, one needs bright foods. Uplifting foods. Foods that make you feel all warm and fuzzy inside, and foods that gather folks 'round the table. Foods that match the mood of the day (i.e. the weather), but also the mood of the cook and the eater (not to mention the refrigerator).
So, in this newsletter, I am happy to present to you mood food: different meals for different kinds of days and feelings. In addition, some thoughts on "boring" food and how to make the everyday feel a little more special, every day.
Sending you warm hugs and lots of koselig vibes (Norway's version of Denmark's hygge*),
👋simone
*I'd argue Norway does it best, but I am most definitely biased
You can read more about the concept here and here.
overcast but still warm out? how about a
summer squash carbonara 🌼
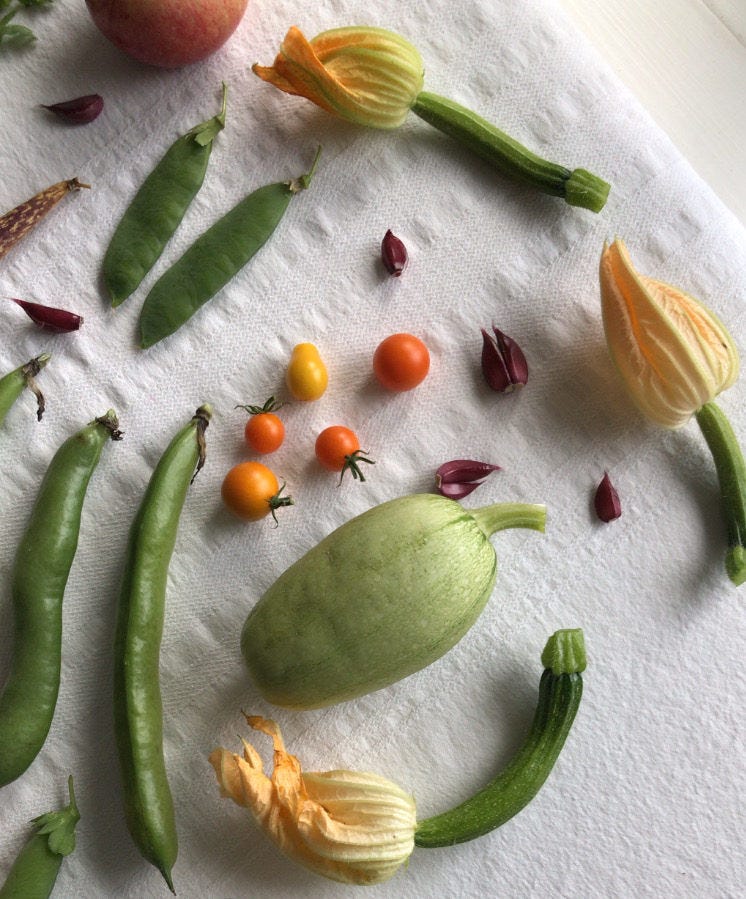
One nice thing about growing your own food is that you can pick it whenever you want. This isn't especially advantageous for all fruits and vegetables but, in the case of squash (both summer and winter varieties), it means you get to expand the flavour experience.
I find that a lot of the zucchini for sale in grocery stores are larger than I'd like, and often a bit too bitter near the skin. Immature zukes, on the other hand — just wow. So tender, so delicate, so mellow. They melt in your mouth and I love 'em for it. Likewise, you can pick a butternut squash before its exterior gets tough and its insides starchy, and you get a lovely mellow thing that'll quickly win you over with its gentle sweetness.
If you can't find any immature or delicate squash varieties near you, worry not: choosing smaller zucchini and peeling away thick skins should yield similar results. The combination of late summer veg with a dish as reassuring as carbonara is, for me at least, perfect for early fall.
•••
SUMMER SQUASH CARBONARA
makes enough for two hungry peopleÂ
• 4 egg yolks (save the whites in a jar and keep them in the fridge for later)
• a generous amount of freshly grated Parmesan or of a similar hard & salty vegetarian cheese* (around 55g, if I had to guess + more for garnish)
• 5 small or 3 large garlic cloves, crushed but unpeeled
• olive oil, enough to cover the bottom of your pan
• 6 small, or 2 medium, or 1 large zucchini (I used 3 small zucchini and a small immature butternut squash)
• 110g of long pasta (we had whole wheat spaghetti; fettuccine, bucatini or linguine would all be great here)
• flaky sea saltÂ
• fine or coarse salt for the pasta water
• freshly cracked black pepper
• optional: squash flowers and/or your tender herb(s) of choice
*I used Vesterhavsost, a wonderful salty North Sea cheese from Denmark that is reminiscent of Gruyère and Parmesan, in the pasta to keep things vegetarian for my dining companion, but topped my own plate with the magic that is real Parmesan
1. In a large bowl, mix together the egg yolks and cheese. It should form a paste — if it's too thin, add a bit more cheese. Set aside.
2. To a large cast iron skillet (or non-stick frying pan) on medium-low heat, add enough olive oil to generously cover its bottom. Pop in your garlic cloves, moving them around occasionally so they don't burn.Â
3. While the garlic infuses the oil, slice your summer squash into thin disks and/or noodle-like strips. Fill a large pot with water and sprinkle in a small amount of salt before bringing it to a boil. Once boiling, add in your pasta and set a timer for a minute less than its package instructions.
4. Remove the garlic from the oil. Add all the sliced squash to your skillet along with a small pinch of salt, letting it cook just until tender and translucent. Stir regularly to as to avoid the squash frying and getting any colour.
5. Once your pasta timer goes off, use tongs to transfer the noodles directly into the skillet along with the squash (it's okay if some pasta water gets transferred too). Toss to combine and coat the pasta with the juices in the pan. Reserve the pasta water.
6. Season your egg yolk and cheese paste with salt and pepper. At this point, you can either add the pasta to the paste or the paste to the pasta (I prefer to add the pasta into the bowl with the yolk paste). Using your tongs, stir the paste through the pasta vigorously and continuously, adding in a bit of pasta water (just 1 Tbsp at a time) in between stirring to help the paste turn into a sauce and to help the sauce cling to the pasta.
7. If using squash flowers or tenders herbs (like basil), stir them in just before serving. Top with extra cheese and black pepper and savour immediately while the pasta is still steaming hot.
Enjoy at a table set with a nice tablecloth and candles (classic), on a blanket laid on the floor by a fireplace (indoor picnic!), or simply sitting on a comfy couch in front of the TV (we all do it).
what to do with leftover egg whites
🥞
It's always a bit annoying to cook a meal that only involves the yolk or the whites of one or more eggs. That is, until you find an exciting use for the leftover egg.
With egg whites, you could always make meringues or chocolate mousse. You could even make Dutch bokkenpootjes. Or, if it's a grey Sunday morning in early autumn and you're not particularly in the mood to whip up anything fancy, you could simply make pancakes (...one could also make egg white omelettes but I personally find them incredibly sad and would never recommend them to anyone).
Sure, pancakes may be a little boring and predictable, but isn't their familiarity precisely what makes them so enjoyable? Having made squash carbonara earlier in the week and looking to use up my egg whites on the weekend, I took great comfort in making these wonderfully boring cloud-like pancakes.
•••
FLUFFY EGG WHITE PANCAKES
makes around 10 medium pancakesÂ
DRY INGREDIENTS
• 2 CUPS flour (I like to combine wheat, spelt & barley)
• ½ tsp each of cinnamon, nutmeg, allspice + ground gingerÂ
• 1 Tbsp ground chia seeds
• 1 Tbsp ground flax seeds Â
• 2 tsp baking powder
• ½ tsp fine salt
WET INGREDIENTS
• 1½ CUPS whole milk (skimmed or plant milk is fine — use what you like and have on hand!)
• 1 tsp vanilla extract or sugar
• 4 egg whitesÂ
• ¼ CUP white granulated sugar Â
OTHER INGREDIENTS
• butter or cold-pressed vegetable oil for greasing the pan
• optional: frozen berries & maple syrup to serveÂ
1. In a large bowl, mix together all the dry ingredients. Add the milk and vanilla to the dry ingredients, mixing well until homogeneous. Set aside.
2. In another large bowl, using a whisk or egg beater, whisk the egg whites until snowy and white. Slowly incorporate the sugar as you whisk, continuing just until the egg whites are firm and glossy.
3. Transfer a generous spoonful of egg whites to the pancake batter and whisk it in well. Then, one large spoonful at a time, carefully add the egg whites to the batter, taking care not to knock out too much air out of them as you go. The end result shouldn't have any distinct lumps of egg white in it, all while remaining light and airy.
4. Let the pancake batter rest a few minutes while you preheat your pan to a medium heat.Â
5. When ready to cook, use a sparing amount of butter or oil to lightly grease your pan, then pour in your first ladleful of batter (roughly ⅓ of a cup’s worth). Let cook until bubbles form at the top and the edges no longer look raw, about two minutes, before flipping to cook for a further minute or so. Repeat until all pancakes are cooked, adjusting the heat of your pan and the quantity of each ladlefuls to your liking.
While the pancakes cook, feel free to stew down some frozen berries (blueberry + raspberry is a great combo) by bringing them to a light boil on the stove on medium-high heat. Serve the pancakes hot, with a spoonful of stewed berries and a drizzle of (potentially patriotic) maple syrup.
fridge nearly empty? how about
tomato pesto orzo 🥫
A lot of what I cook is never shared online. Mostly because I don't film or take pictures of everything I make (how exhausting!), but sometimes because I make something that I'd love to share but that just ends up looking kinda meh in a photograph.Â
This was one of those dishes, but I decided to share it in my stories anyway because it just tasted so. darn. good.
So imagine my surprise when I received a whole host of messages telling me how good it looked! One comment (from an awesome stranger who's become somewhat of an instagram friend over the years) particularly struck me.
When I told her I nearly didn't share the picture because I thought the food looked boring, she enthusiastically replied that I always make "boring looking food" look good. And I took this as a great compliment! As much as it's fun to scroll through elaborate, exotic and ornate meals on Instagram, I think most of our realities are a lot less glamorous. And that's more than okay. Food doesn't need to be impressive to be delicious or nourishing. Simple food can be good too.
This dish celebrates just that.
•••
TOMATO PESTO ORZO
makes 4 or so portions, more if served as a side
• 2-3 fat cloves of garlicÂ
• 1 medium-large carrot
• 1 medium-large red onion (a yellow or white onion is probably fine too)
• extra-virgin olive oil
• flaky sea salt (I use Maldon in nearly everything)
• around 1½ CUPS orzo or risoniÂ
• around ¾ CUP red wine Â
• around 3 CUPS vegetable broth (chicken stock should work well too)Â
• 130g (i.e. a small jar) of good tomato pesto (if you're in Norway, I recommend Coop Smak's rød pesto)Â
1. Very finely dice the garlic, carrot, and onion.
2. Bring a large skillet or frying pan to medium heat. Once hot, pour in enough olive oil to cover the bottom of the pan, then add in your diced veg. Sprinkle in a small pinch of salt, and stir a bit to coat everything in the oil.
3. Let cook, stirring occasionally, until you hear the onion mixture go from a smooth bubbling sound to a harsher, more high-pitched sizzle. You want to cook off the water and give the base a bit of colour and caramelisation.
4. Next, add in enough orzo to cover the bottom of the pot uniformly. Stir it through, letting it toast a bit in the oil for around 3-5 minutes, stirring only occasionally.
5. Bring the heat up slightly to medium-high and pour in roughly a small cup’s worth of red wine. Once most of it has evaporated, add around 1.5 cups of vegetable broth + a splash of olive oil and a pinch of salt. Let cook, stirring occasionally, until the orzo has absorbed nearly all of the liquid.
6. Next, add the rest of the broth along with the tomato pesto. Let cook, stirring, until most of the liquid is gone.
Serve hot, optionally with a delicate garnish of thinly sliced parsley.
I had a bit of leftover rice in the fridge that I threw in at the end, so there's an option for you if you've also got some leftover grains to use up. Excellent the next day, on its own or as a side (I ate the leftovers with salmon I baked with dill & lemon + some microwaved frozen peas).
don't feel like cooking but still want something nice? how about
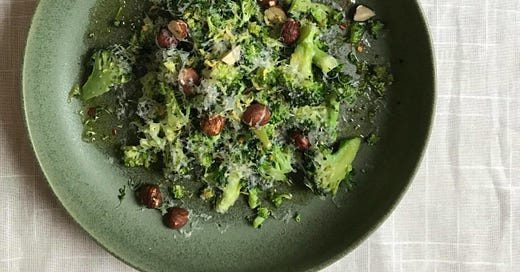
garlicky broccoli w/ hazelnuts 🌰
Speaking of boring, everyday, things: how about broccoli.
Life is arguably, for the most part, filled with the boring and the banal. Repetitive routines, humdrum habits, mundane moments. It can be easy to turn to the occasional holiday or shopping spree as the only thing to look forward to, a distant motivation to keep chugging along.
But I'd argue that life becomes a whole lot more wonderful when you realise that the boring and the banal have great potential to be quite enjoyable.
It's why I advocate for taking an extra minute to set your table nicely, with linens and tableware that make you happy, a candle or two that bring warmth and light, and some pleasing music to set the mood.
Broccoli can be boring, because by now we've all eaten it hundreds and thousands of times. But give it a little extra attention and I guarantee your appreciation of it has the potential to be far from ordinary.
•••
GARLICKY BROCCOLI WITH HAZELNUTS
more of a guide than a recipe — adjust to your liking
1. Grab a small handful of hazelnuts, cutting some in half and keeping others whole. Toast in a dry pan on medium heat, tossing occasionally, until fragrant and tanned. Set aside.
2. Chop up some broccoli florets into different sizes — from breaking down a floret into chunky thirds to finely chopping a floret into teeny tiny mini trees.
3. Put the larger florets in a pan on high heat. Add in a knob of butter and a small splash of water and keep the broccoli moving around the pan. As it turns vivid green, add the rest of the florets + a sprinkle of sea salt and multiple grinds of dehydrated garlic granules. Take the broccoli off the heat before it gets any colour on it (the whole process takes less than 5 minutes). The outer part of the broccoli should be tender, but the inside should still have a bit of bite.Â
4. To serve, transfer the broccoli to a plate. Top with the hazelnuts, grate on some Parmesan (or a vegetarian-friendly alternative), a bit of lemon zest, flaky sea salt, black pepper and a final drizzle of olive oil.
For a bit of extra heat, throw on some chill flakes!
That's all from me this month! Stay cosy, and see you in the next newsletter 💛
This was a Substack edit of an archived newsletter. To read the newsletter in its original format, click here.