Pear & Ginger Scones, Leek & Butternut Risotto
what to cook now + tips for preserving the summer season ✨
Allô! 👋
Happy Sunday! My favourite day of the week. A day to go inward and look after my home and myself. On Sundays I like to tidy up things that I was too busy to tidy during the previous week, prepare anything that needs preparing before the next week ahead, go out for long walks that can't be walked any other day, and give myself the time to read and knit and play music — all delightful activities for which there is simply no time during the rest of the week.
In fact, fall feels a bit like a Sunday. Spring is like your Tuesday and Wednesday: hopeful and quietly productive. Summer is the Thursday to Saturday, rushing around to wrap things up at work and hurrying to get all the shopping and traveling and partying in. And winter is like a dreaded Monday... sapped of energy and lasting seemingly forever.
Yes, fall feels like a Sunday. The days are darker, shorter and colder; it's a perfect time to take time, and to make time. To go inwards. To recharge, rest and restore. To recover from the frenetic summer past and to prepare for the somber winter ahead.
In this edition of the newsletter, you'll find ideas for things to cook this fall, but also for things to prepare. In other words, foods you make now to enjoy (much) later. In addition to warmly spiced scones and a lush risotto, I'll be telling you all about making mulled apple cider with pear and rose hips, dehydrated apple rings, olive oil confits, and lacto-fermented vegetables. Perfect kitchen activities for a Sunday, or any fall day (what's the difference?).
Here's wishing you a happy November and a happy end of daylight savings/summer time,
👋simone
it's fall:
what to cook?
🍂
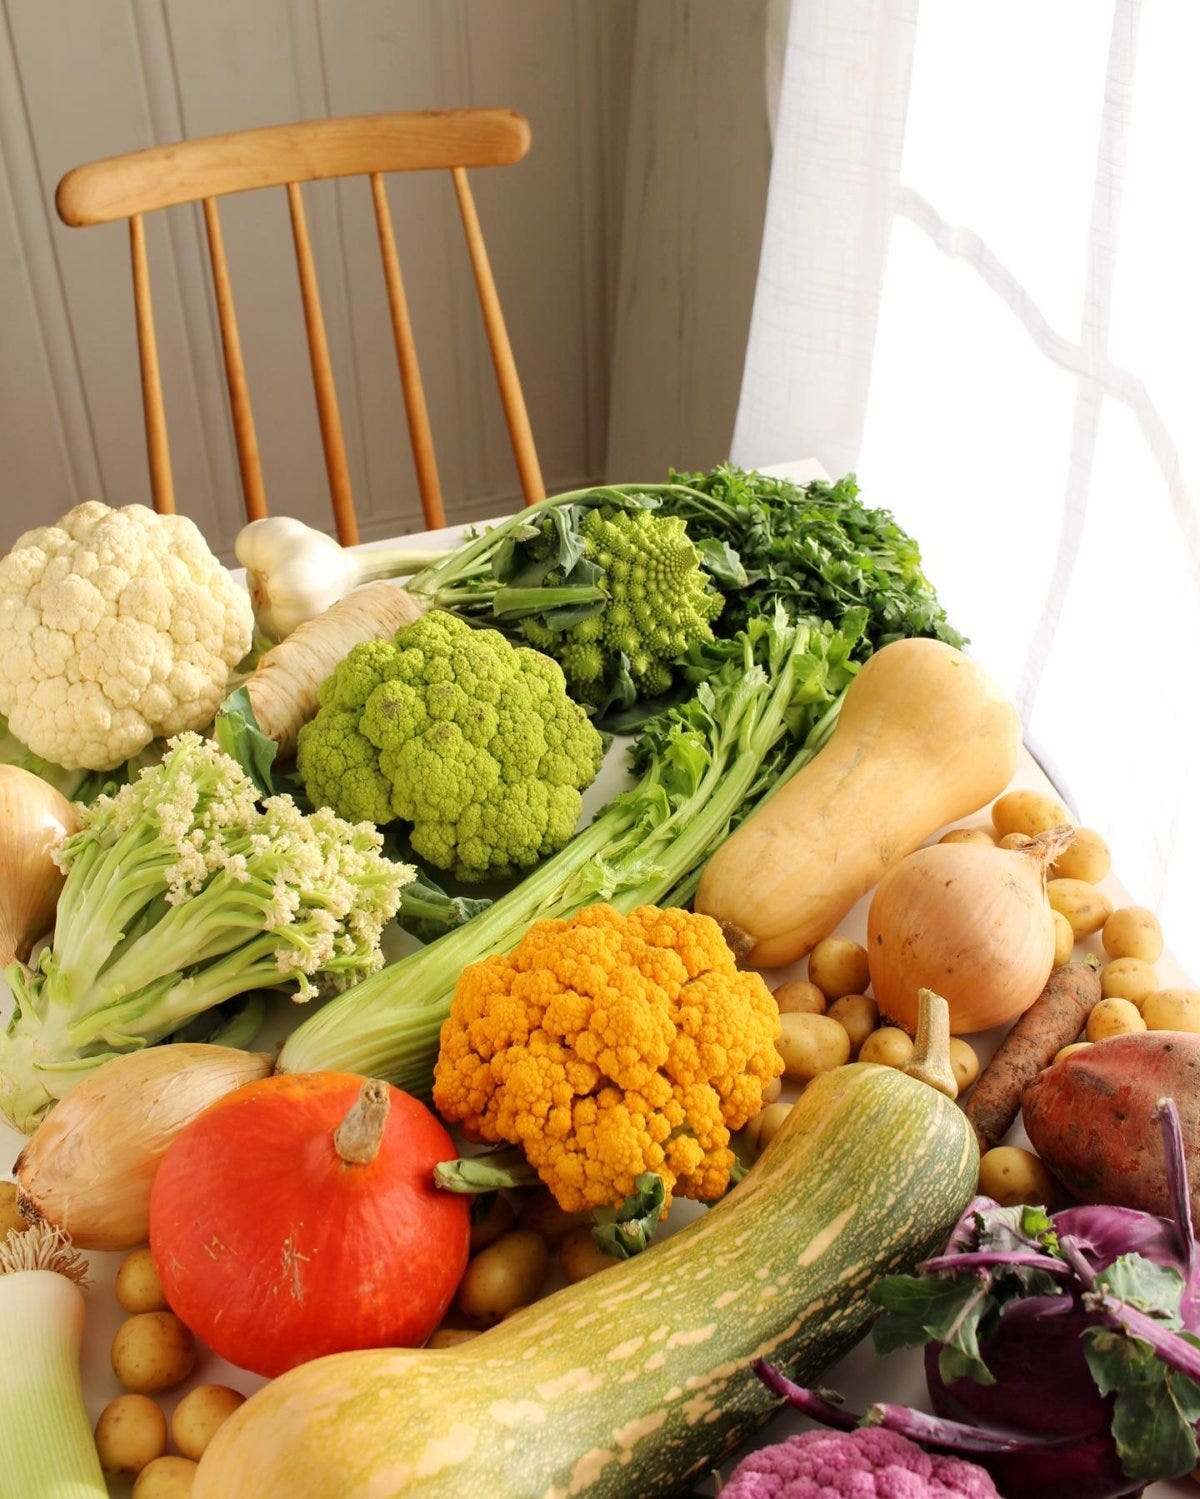
Ah, fall cooking. The start of a long season of transforming hard roots, sturdy brassica leaves, and robust starchy cucurbits into gentle, comforting dishes — all thanks to the careful application of warming spices, rich broths and savoury sauces (something which admittedly, by the end of February, gets to be a little bit humdrum). Some people refer to this time of year as the start of "brown food season", but I'd argue that it's far from that: vividly orange squashes, bright red and pink and golden beets, deeply green cabbages, snow white parsnips and chicories, and delicately pale celery, cauliflower and quince all dare to challenge the notion.
Be that as it may, there's absolutely nothing inherently wrong with brown foods. Let's not discriminate! Indeed, here are some ideas for meals of all colours to help you celebrate and make the most of your fresh produce this fall:
winter squashes & pumpkins 🎃 excellent roasted with nothing but a lick of oil and a sprinkling of salt, you'll want to put these in your soups and salads and rice dishes and pasta dishes too. have extra time on your hands? try roasting the seeds (or not) and shelling them (or don't) for a nourishing snack or a tasty garnish/topping. pair well with: sage, feta, coconut, curry spices, apple, cinnamon, whole grains.
celery, onions & leek each is fantastic alone in its own right, but together they can work magic in the shadows and make other ingredients truly shine. dice finely and soften in a bit of fat as a base for nearly any dish or braise whole in a rich flavoursome broth and you're practically guaranteed to have a nice meal. pair well with: garlic, white wine, bay leaves, mustard, chicken broth, white beans.
apples, pears & quinces 🍏 though raw apples and pears make great fuss-free snacks, cooking them — as well as quinces — opens up a whole new world of flavour. these bake beautifully into crumbles or cakes, are fantastic poached in spiced wine for dessert, and will balance roasted meat and various cheeses with ease. pairs well with: pork, red wine, cinnamon, thyme, brie.
Brussels sprouts & other cabbages easily overcooked by many, you'll want to steer clear from boiling them for hours on end. best sautéed, roasted or braised until their inner stem is tender and their exterior leaves are vibrant or crisp. pair well with: bacon, balsamic vinegar, orange, garlic, mashed potatoes, cranberries/lingonberries.
cauliflower, broccoli & other flowering brassicas 🥦 much like their fellow brassicas above, you don't want to overcook the flavour and texture out of these. consider sautéing on high heat, gratinating in a cheesy, creamy dish, or adding raw to salads. from rapini to romanesco broccoli, these come in a wide variety of colours, shapes and sizes so try to find and enjoy as many as you can. pair well with: ginger, chilies, cheddar, sesame oil, tahini, almonds, lemon.
mushrooms 🍄 although you can find button mushrooms grown indoors year-round, you'll want to be keeping an eye out for the forest-foraged varieties at this time of year. their unique textures make them great flavour-sponges, as well as the perfect substitute in any dish where you might be otherwise tempted to cook some meat. pair well with: cream, garlic, miso, white wine, thyme, soy sauce, black pepper.
rosemary & thyme 🌿 they look great. they taste great. they're great for you. this is just a friendly reminder that having herbs in and around the kitchen is always a great idea. pair well with: pretty much anything, as long as you're creative.
chicories & other leafy things even though summer's gone, the days of beautiful bountiful salads have yet to leave us. from raddichio to endive, and escarole to frisée, you would be forgiven for wanting to eat these every single day. pair well with: wine vinegar, shallots, olive oil, chives, mustard, dill, walnuts, pears, goat cheese.
carrot, parsnip, celeriac, rutabaga & other roots 🥕 these starchy fellows all make excellent mashes (and will undoubtedly give a much-needed boost to any plain mashed potatoes). consider slow-roasting for at least an hour or two, basting in butter and their own sweet juices as you go, to achieve something caramelised and tender and worthy of being the star of the meal. pair well with: butter, parsley, apples, coriander, fennel, hake and trout.
recipe for pear & ginger scones
🍐
You may remember seeing these gently spiced, caramelised pear and crystallised ginger scones in my Instagram feed, so I do apologise if they are old news to you. The thing is, they're also good news. Tasty news. Sit-down-with-a-good-book-and-cup-of-tea news. In other words: too delightful not to share again.
The recipe below is more detailed than the character-limited one I shared in the original scone post, with all the tips and details you need in one place. Though, if there's one thing you need to remember, it's to keep your dough cold: that's what will make your scones light and flaky rather than dense and doughy (and it's why we cool the pear & ginger blend and freeze the butter)! As always, if you're more of a visual learner like me, you can watch the scones being made right over here.
•••
CARAMELISED PEAR & CRYSTALLISED GINGER SCONES
makes 8 scones
FOR THE PEAR & GINGER BLEND
• 1 Tbsp butter
• 1 Tbsp brown sugar
• 1 tsp ground cardamom
• 1 tsp ground cinnamon
• 1 tsp ground nutmeg
• 2 medium pears, peeled & diced
• 2 tsp fresh or frozen ginger, finely grated
• 1 Tbsp crystallised ginger, finely diced
*I like to keep a nub in the freezer — it's super easy to grate with a microplane, and you're almost guaranteed to always have ginger on hand
1. In a pan on medium-high heat, add your butter, sugar and dry spices. Let the sugar melt into the butter, stirring occasionally with a rubber spatula as it does.
2. Add the diced pears to the pan. Stir gently to coat the pears in the spiced caramel, then add in the freshly grated ginger and the finally diced crystallised ginger.
3. Continue stirring gently until the pears are softened, brown & juicy — about 5 minutes.
4. Remove the pan from the heat and transfer the pears and juices into a small strainer placed over a bowl.
5. Leave in the fridge to cool and drain.
FOR THE SCONES
• 120g unsalted butter
• 175 ml total of heavy cream + the juice of ½ a lemon**, + the juice from the pears
• 5 ml or 1 tsp vanilla
• 1 egg
• 270g unbleached wheat flour + 50g whole wheat flour***
• 1 Tbsp baking powder
• 1 tsp baking soda
• ½ tsp fine salt
• ¼ tsp each of ground cardamom, ginger & cinnamon
• 40g white granulated sugar
• ∼150g pear & ginger blend (∼170g total before being drained of its juices)
• extra cream & sugar for brushing and dusting the tops of the scones
• extra flour for dusting the kneading surface
**you could use buttermilk if you'd like, but I find that you often end up having to buy it specifically for a recipe, and then you're stuck with leftover buttermilk (whereas cream and a half a lemon are more versatile things to have in your refrigerator)
***the addition of the whole grain flour makes a lovely difference the final texture of the scones, but don't worry about buying some just for this recipe if you don't have any on hand
1. Place the butter on a plate and leave in the freezer to harden and cool. Preheat the oven to 200°C/390°F.
2. Squeeze the lemon juice into a measuring cup and add in all the caramelised juices from the pears. Top up with the cream to reach a total of 175ml in liquid. Whisk together and leave to thicken a bit while you move onto the next step.
3. In a large bowl, combine the flours, baking powder, baking soda, salt, spices and sugar. Whisk until well mixed.
4. Whisk the egg and the vanilla into the cream mixture.
5. Remove the butter from the freezer and grate it into the bowl of dry ingredients. Using a fork, stir it through, trying to cover each butter flake in flour as you go. Then, fold in the pear & ginger blend, coating each piece in the flour mixture too.
6. Pour the cream blend into the bowl and gently stir the wet ingredients into the dry ones using a fork or spatula just until everything starts coming together into a shaggy lump.
7. On a lightly floured surface, gently flatten the dough into a rough and shaggy disc using a few quick pats of the heel of your dominant hand (your palms are likely too warm for this). Fold the dough in half over itself four times, then quickly pat it back into a circle 2.5 cm or 1 inch thick.
8. Using a long knife (or some kind of kitchen wire or thread, if you've got some), cut the disc into 8 equal triangles. Place each triangle onto a baking sheet lined with a reusable silicone mat or parchment paper, then freeze for 10-15 minutes or refrigerate for up to 1 hour. You want your scones to be firm before baking, so the butter will steam instead of melt in the oven, making your scones puff upwards instead of pooling outwards as they bake.
9. Remove the baking tray from the fridge or freezer and lightly brush the scone tops with cream before sprinkling from high above with sugar. This will give your scone tops a nice shine and a sweet crunch. Bake for approximately 22 minutes in the center of the oven, or until the tops are nicely golden brown.
10. Once the scones are done, remove the baking tray from the oven and place it on a rack to cool, just for a few minutes (or the amount of time it takes to make a pot of tea).
Enjoy warm, cut in half, toasted and slathered in butter if you wish, or dunked in tea, or simply plain!
one, two, three, four
autumn kitchen activities
👩🌾
Lately, I've been trying my hand at making food and drinks that I could easily buy ready-made in a store, but that seem kind of fun to make at home (and that people often say tastes better — and costs less — when made from scratch).
Though I'm far from being an expert on any of these things, they've been fun to experiment with (and to taste, mostly to taste) so I figured that showing you my attempts at different kinds of food processing and preserving might give you the itch to try it too (though feel free to search the internet to find more experienced people's advice as an additional reference).
•••
one: making hot apple cider
Turns out all you have to do to make mulled cider is put some apples (and optionally other fruit) in a pot with spices, cover with water, and leave to simmer away.
To make my cider, I started with some wild apples, pears and rose hips that I picked around my home. I cored and quartered the apples and pears, then halved the rose hips to scrape out their spiky/fuzzy inner seeds. Everything went into a big pot with some mulling spices (cloves, cinnamon, star anise and orange peel), which I then covered by 5cm with cool water. Brought it all to a strong simmer, then covered the pot with a lid and lowered the heat. Simmered for an hour, then mashed the cooked fruit and simmered for an another hour (uncovered this time). Strained everything through a fine sieve so as to only retain the lovely juices, and I was all set with my hot mulled apple, pear and rose hip cider! For proper instructions, check out this recipe and this recipe.
two: making dehydrated apple rings
This one is also quite straightforward. Take some apples, slice them thinly* and evenly (peeling and coring optional), then place on a lined baking sheet and leave to dehydrate in an oven preheated to 100°C/210°F for 4+ hours, or until they've shrunken and lost a lot of moisture and are as tender or as crisp as you desire. Easy peasy!
*the thinner (i.e. 2-3mm or ⅛ in), the crispier; the thicker (i.e. 4-5mm or ¼ in), the chewier - use a mandolin for even cuts!
•••
three: making olive oil confits
I shared the tomato confit I made in this post and in this story but, in doing so, I may not have conveyed just how much you need to make this (by the way, the picture below is a bell pepper and onion confit and my oh my was that also incredible and worth making again and again).
Here's how you make 'em: set your oven to 150°C/300°F. Add your favourite herbs and aromatics to the bottom of a baking dish*. Top with the thing you want to confit. Sprinkle with salt. Cover with enough olive oil to submerge the bottom third or half of what you are confiting. Place in the oven for 2.5-3 hours. Store in a container in the fridge for up to a week. Use an instant pasta sauce, a toast topping, as a sauce for cooked meats and beans alike.
*for the tomato one I used a few cloves of garlic, fresh thyme, dried oregano and chili flakes; for the peppers and onions I used a bay leaf, white wine vinegar, and smoked chipotle.
•••
four: lacto-fermenting vegetables
In other words, making pickles! Not the vinegar and sugar kind, but the salty, briny kind that relies on good bacteria to break down your vegetables. Watch this video, this video, or this video to get a better idea.
The basic idea here is that you take a clean jar (a spritz of vinegar and a hot water rinse followed by an air-dry should do the trick), place it on a scale and tare the weight, then pack it with whatever you want to pickle + spices and/or aromatics. Cover with water, use the weight of the jar's contents to calculate how much salt you need for a safe fermentation (I use: contents' weight (g) x 0.025 = weight of salt needed in grams), then pour out the water into another vessel to dissolve the salt into it. Pour the newly-made salt brine back into the jar, place a weight to keep the things you're pickling submerged, cover with a lid and you're done! All that's left to do is leave the jar in a dark place and release CO2 from it daily until you're happy with the flavour. Refrigerate for future enjoyment for up to 6 months.
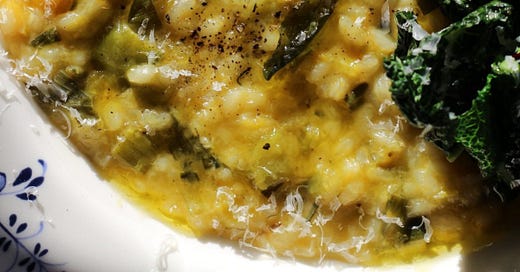
leek & butternut squash risotto (with a side of sautéed greens) 🍚
Okay, last but not least: the last recipe! Butternut squash risotto cooked with sage is a seasonal classic for a reason: it's really good and it's a really good way to use up that giant butternut squash that's hogging up all your counter space. This version has leek and safran in it and is served with some sautéed greens and, if I do say so myself, is even better than the basic classic.
•••
LEEK & BUTTERNUT RISOTTO
less of a recipe, more of a guide (cooking is more art than science after all) — made enough for 4 generous servings
1. Prep the squash. Start by peeling a small butternut squash, or the bottom half of a large one. Remove the seeds and cut into cubes. Evenly distribute the squash cubes onto a lined baking sheet, cover with fresh or dried sage leaves, toss with olive oil and salt, and bake at 205°C/400°F for around 30 minutes (until cooked through and beginning to caramelise).
2. Make a vegetable stock. Prepare a stock by putting a halved onion (skin on), a quartered large carrot, and two quartered ribs of celery into a pot along with fresh thyme, a couple of bay leaves, fresh rosemary, 6-8 whole peppercorns and a generous amount of salt. Cover with water, bring to a boil then turn down the heat and leave to simmer gently for 25-45 minutes.
3. Start the risotto. Slice both the green and the whites of a small leek into medium-thin rings. Wash well. Peel and dice a large shallot.
4. To a large skillet on medium-high heat, add a pat of butter. Once the butter has melted, add in the shallot and the leek. Season with salt. Cook, stirring occasionally, until the leek has softened and the shallot is translucent (you'll hear when they're done when the pan goes from a soft sound to a more high-pitched sizzle).
5. Finish the saffron stock. In the meantime, strain your stock into a large bowl. Add in a few threads/tiny pinch of saffron and stir.
6. Continue with the risotto. Add enough risotto rice to cover the bottom of the pan with the leek and shallot, and stir to combine. Once the rice has toasted for 2 minutes or so in the pan, deglaze with a generous splash of white wine or a small splash of vermouth. Keep stirring and cooking until all the alcohol has evaporated.
7. Keep stirring the risotto as it cooks, adding one or two ladlefuls of the stock as a time, and adding more once the previous ladlefuls have been absorbed.
8. Finish the squash. Remove the squash from the oven when it's done, and mash half of it down with a spatula or wooden spoon. Add the mashed squash to the risotto before all the stock is used up.
9. Finish the risotto. As you add the last ladleful of stock, turn off the heat and add in a large pat of butter to the pan. Whip the butter through the risotto using a swift stirring motion. Gently stir the squash cubes in at the end.
10. Finish the dish. Quickly sauté some greens* in a pan on high heat with a small splash each of water and olive oil. Sprinkle with flaky salt and remove from the heat as soon as tender and vibrantly green. In another (small) pan, fry some sage in olive oil on medium heat. Serve by ladling the risotto into a deep dish or shallow bowl, and giving the plate a shake to spread out the soupy rice. Top with the fried sage leaves, freshly grated Parmesan, freshly cracked black pepper and a drizzle of the sage oil, plus a portion of the sautéed greens. Enjoy!
*I used kale, chard and sorrel from our garden — very exciting!
I might share a video step-by-step of this dish on my Instagram Stories soon, so you can watch it being made there (but you saw it here first, folks!)
That's all from me this month! See you when the snow's arrived 💛
This was a Substack edit of an archived newsletter. To read the newsletter in its original format, click here.