


Green Onion Aglio e Olio & A Zesty Chickpea Tajine
what to cook (and sow) this spring
Allô! 👋
You were warned that this is a monthly-ish newsletter, so I suppose it's no big surprise that it's been two months already since the last one. If you follow me on Instagram, you'll know that I was away in Paris at the end of last month (that feels so snobbish to write!) so, in more ways than one, it feels good to be back.
March was a very exciting month for me, simply due to the fact that the days finally started to get noticeably longer and brighter again. Norwegian winters are rough, daylight-wise (will I ever get used to them? let us pray) so the early spring sunlight felt especially welcome.
For me, March also meant seed-sowing. Last year was my first time growing vegetables on a larger-than-balcony scale so, needless to say, a lot was learned. This year, ready to apply all my newfound knowledge, I turned part of my office space into a dedicated potting shed / plant nursery and spent what felt like most of the month making sure I didn't accidentally kill off any of my precious seedlings.
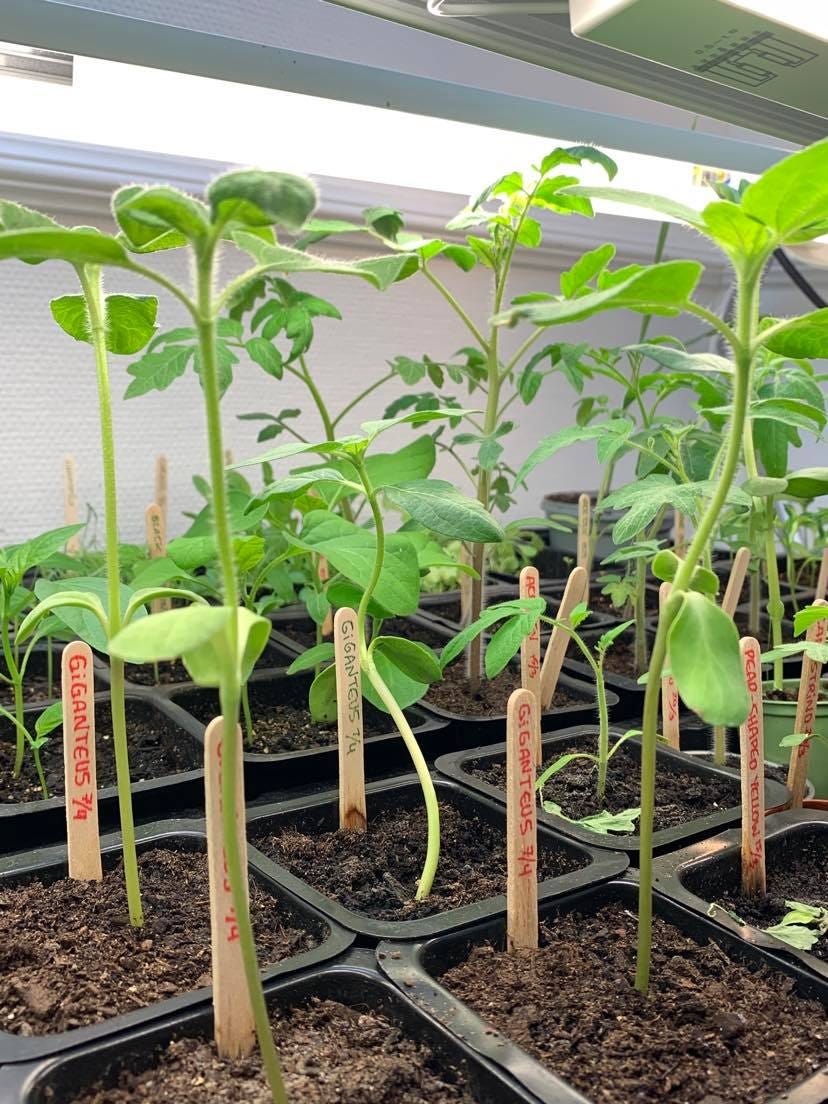
Fast-forward to April, and seed-sowing has turned into more seed-sowing, plus repotting, plus seedling-transplanting, plus garden bed-preparing — plus a whole lot more sunlight. Which is perfect, because spring is the time of year when I most feel like there just aren't enough hours in the day. At least now I can work in the yard past nine p.m. (which is currently when the sun sets here... we don't even have nights anymore, just twilights)!
The frenzied, frenetic urge to do everything at once extends to the kitchen as well, and this month I was trying to do it all: the first peas, the first radishes, the first asparagus, the first rhubarb (though I haven't been able to find any yet — even in Canada, I never expected to see rhubarb before May or June — but that's okay. I still need to make my way over to the warmer Norwegian coastline forests in search of fiddleheads and wild garlic, anyway). Then I sliced off the tip of my finger.
I'll spare you the details, in case that's not your thing, but basically it's made basic tasks like gardening and cooking juuust a little bit more uncoordinated and slower to complete.
Luckily I can still easily type with nine fingers, and I am thrilled to be including a bunch of spring recipes, tips and ideas in this newsletter: which ingredients to cook with right now, how to make an easy spring pasta from scratch, growing food from groceries, a recipe for a luxurious chickpea tajine, and things to listen to while you're planting seeds or spring cleaning, or both. I hope you'll enjoy!
Wishing you good food, good mood, and a sense of all being renewed (it is spring after all),
👋simone
it's mid-spring: what to eat? 🌱🐣🌷
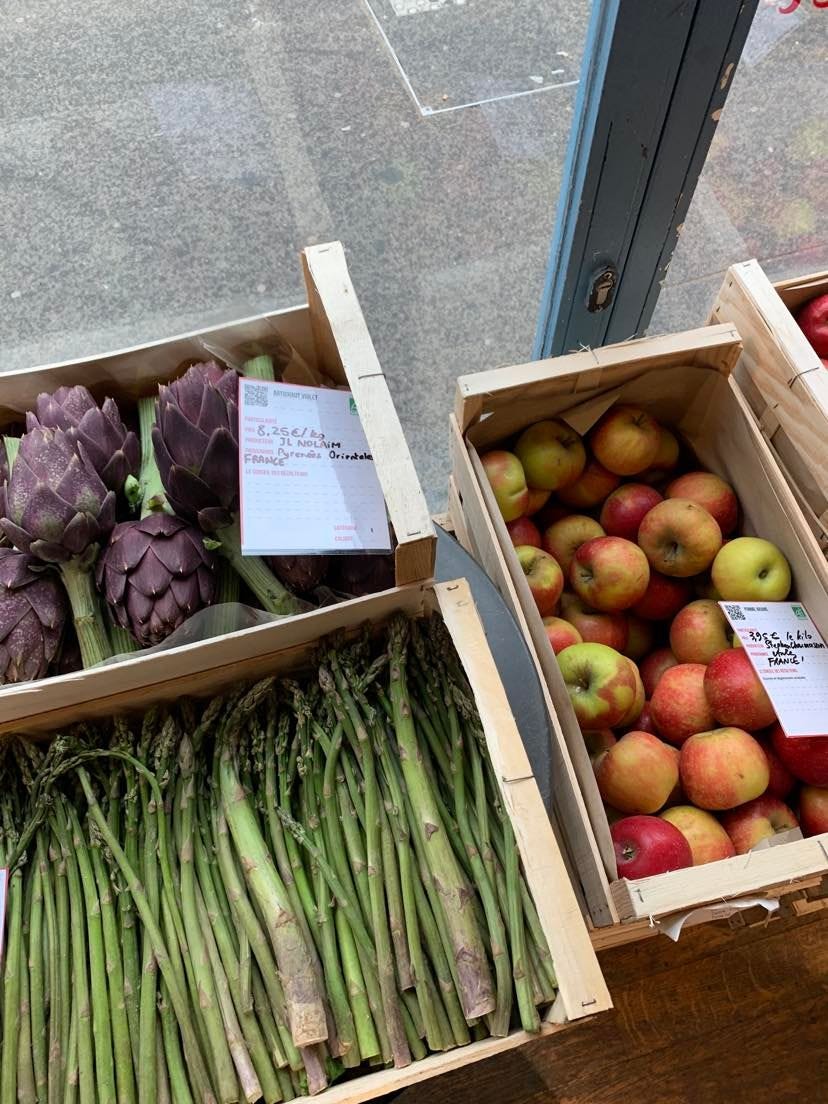
Everything's coming up green, yellow and pink — be it in the garden or on your plate. First come chives, morels, nettles, fiddleheads and wild garlic. Then: spinach, arugula, sorrel, lamb's quarters, purslane, chard and watercress. Next thing you know, you've got green onions, asparagus, broad beans and broccolini, pea shoots, eggs, artichokes and garlic scapes, lettuces, radishes and rhubarb. There are so many new exciting things to eat! Here's a roundup of some of my favourite dishes to cook this time of year.

a very versatile asparagus quiche
When it comes to asparagus, you’ve just got to seize the season and eat as much as you can before they’re gone again. At least, that’s my philosophy.
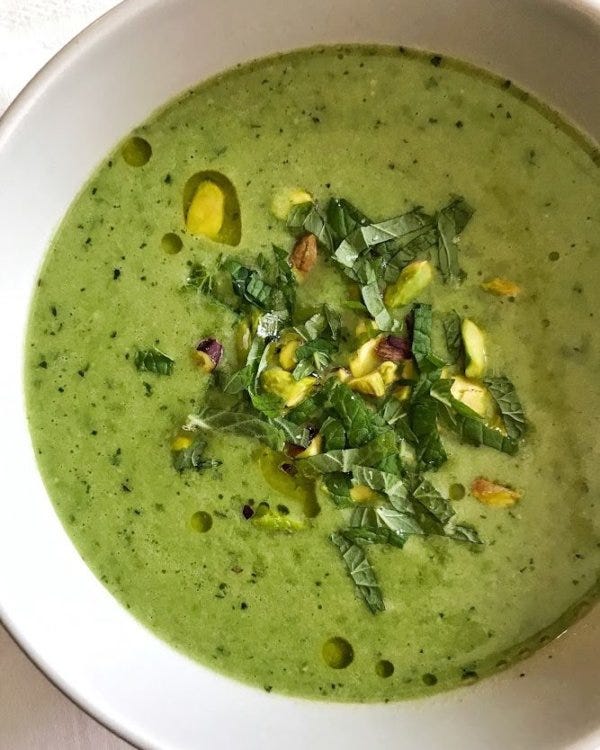
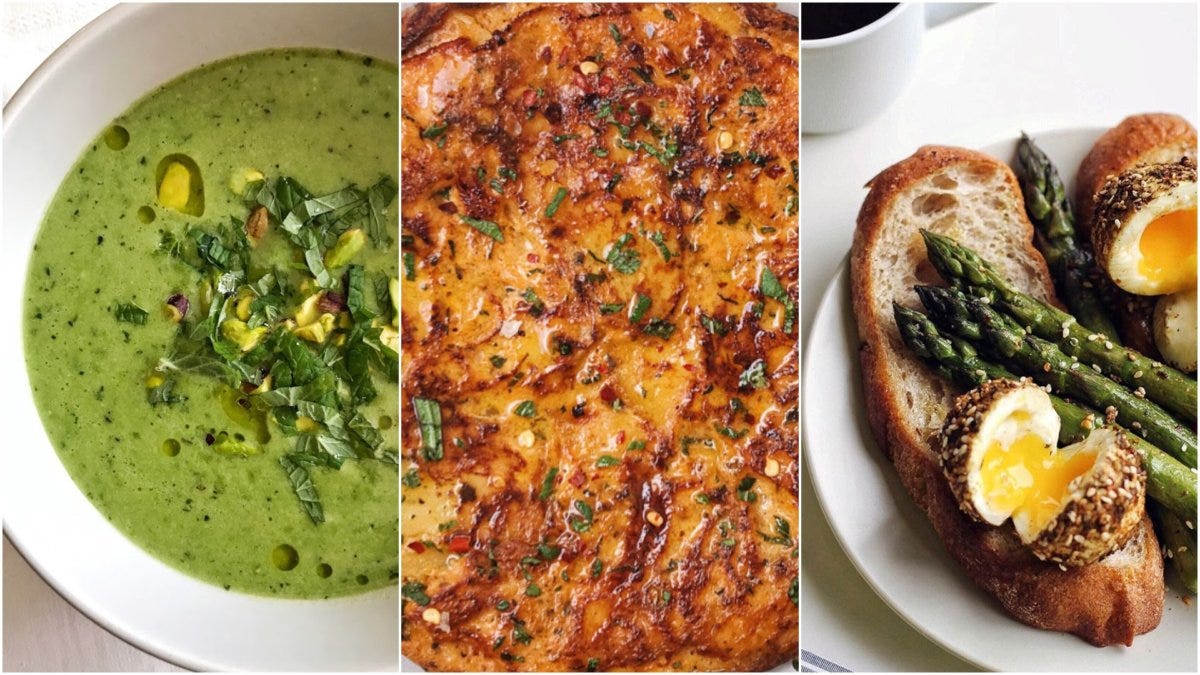
cool pea soup
This cool mint & pea soup with pistachios on top is perfect for those warmer spring days where one could easily be forgiven for thinking it's summer already.

cardamom & orange rhubarb cake
So you got some fresh stalks of rhubarb and some yoghurt. Now what? Bake a cardamom-spiced and orange-scented rhubarb cake, of course!
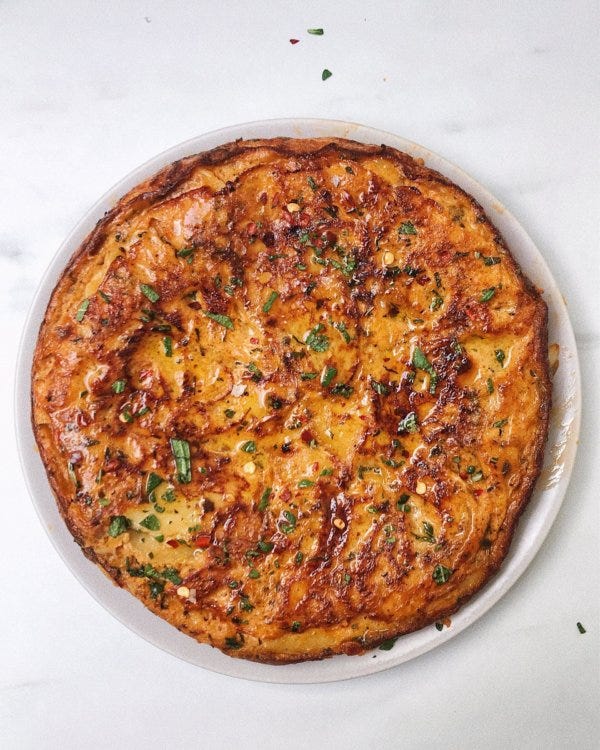
tortilla de patatas with gochujang & woody herbs
A Spanish classic with an unexpected twist.

asparagus & spiced egg on toast
If you're a fan of runny egg yolks, you hardly need an excuse to eat this fantastically quick dish — be it for breakfast, lunch, or dinner.
a fresh spring pasta
🍝
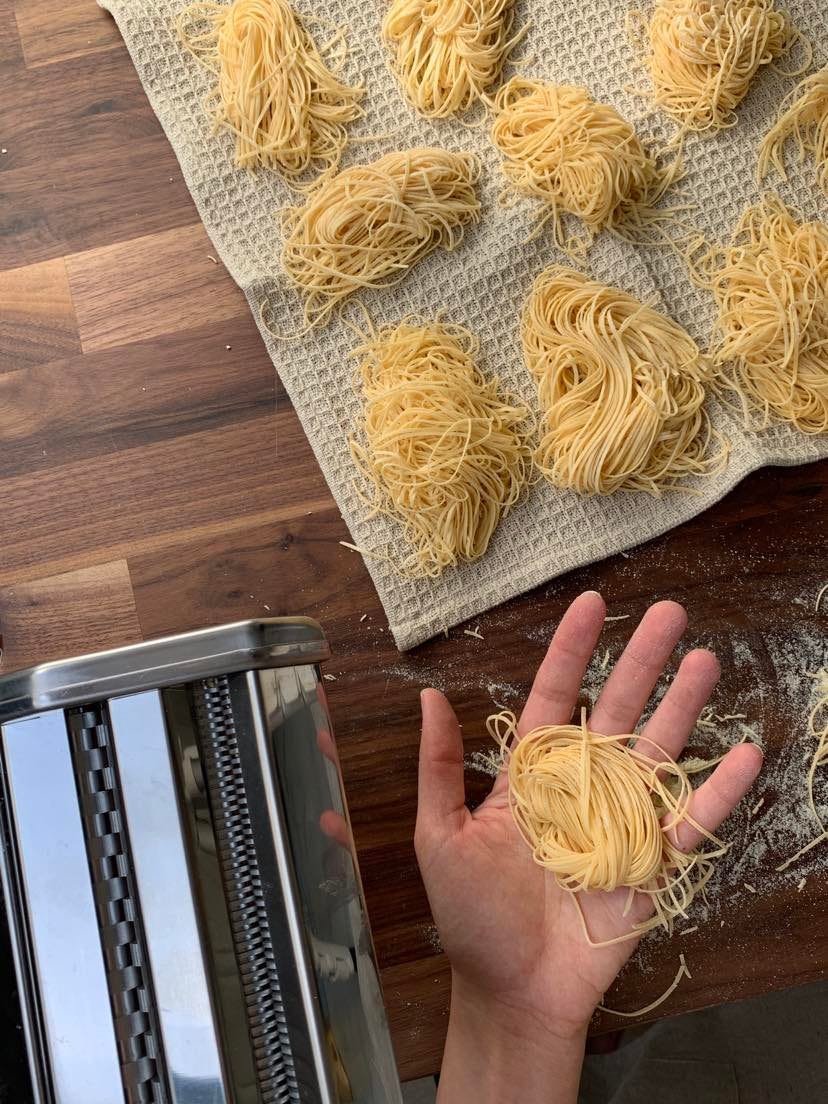
I made some pasta the other day for the simple reason that I was craving aglio e olio, a dish that calls for a long, thin noodle, and we didn't have any at home. For a moment I gave up on the idea of having the garlicky, olive oily pasta until a trip to the grocery store could be made — and then it occurred to me that we did have flour and eggs, and that pasta really isn't all that hard to make.
I used a pasta machine to make these capellini, but you really don't need one. In fact, my preferred way to make pasta has always been by hand.
•••
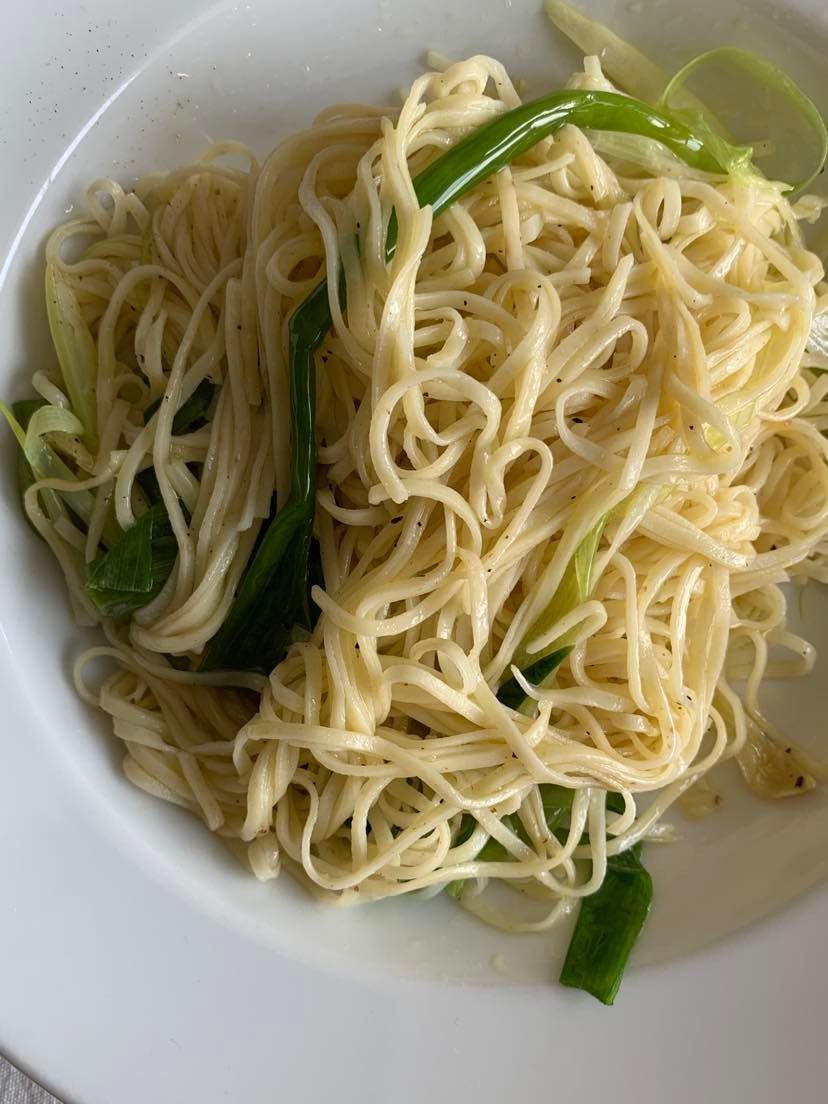
LONG, THIN NOODLES (CHOOSE-YOUR-OWN-ADVENTURE FRESH PASTA) / GREEN ONION AGLIO E OLIO
makes around 16 little pasta nests weighing ~20g each, or around 4 portions / the dish serves two, so you'll have freshly dried pasta for another day
INGREDIENTS
• 150g tipo "00" extra fine flour
• 50g semolina flour
• 2 eggs, room temperature
• extra virgin olive oil, enough to generously cover the bottom of a frying pan
• 4 (large) or 5 (medium) cloves of garlic, peeled
• 3 (large) or 4 (medium) green onions
• coarse sea salt
• fine or flaky sea salt
• freshly cracked black pepper
PART 1: MAKING THE FRESH PASTA
1. Weigh out 150g of 00 flour and 50g of semolina flour, and combine them into a well on a clean wooden board or countertop.
2. Crack your two eggs into the centre of the flour well, and gently whisk them using a fork. Slowly start incorporating flour into the eggs by scraping at the edges of the well, being careful not to let the eggs spill out of the well as you go.
3. Once the egg and flour mixture is no longer runny and starts turning into a paste, scooch aside any excess flour from the outer well (you never know how much flour you'll need, but you're better off starting with not enough flour in your dough than too much). Set the fork aside and start kneading with your hands, incorporating just enough flour as you go to get a dough that is soft, but no longer sticky. If it starts feeling a bit dry and stiff, you may have added too much flour — worry not, you can always wet your hands a little and resume kneading; though this is easier to fix at the start of kneading than towards the end (and is best avoided altogether).
4. To knead, push the dough down and away from you, then fold it back in half onto itself (pick up the edge furthest from you and bring it towards you) and repeat, making quarter-turns in between each push-and-fold sequence. The aim is to stretch and work the dough in a way that will build up its strength and develop the gluten into a cohesive network. You'll want to knead continuously for around 10 minutes, or until the dough has become smoother, more supple, and no longer tears when stretched. Leave to rest in a dishcloth-covered bowl or wrapped in a plastic bag for at least 30 minutes at room temperature, or in the fridge if longer than 2 hours (you'll want to bring the dough back to room temperature before the next step, though, as pasta doesn't really like being cold).
5. Once the dough has rested, divide it in half (or in as many parts as you have eggs). You'll want to work on one half at a time, keeping the other well-wrapped so as to avoid it drying out. Flatten the dough into a thick disc using your hands before switching to the rolling pin or the pasta machine.
If working by hand, you'll want to roll out the dough into a large rectangle, getting it as thin as you can (you should be able to see the shadow of your hand through the sheet when picking it up). Toward the end, you might want to let the dough rest a minute or two between stretches.
If using a pasta machine, start on the widest setting and roll your dough through. Fold it in three like a book, then roll it again on the widest setting with the folded edges perpendicular to the rollers. Fold it in half and roll through once more on the widest setting, with the folded edges perpendicular to the rollers. Then proceed to roll the dough through the machine once on each progressively narrower setting.
6. To cut the dough without a pasta machine, you can sprinkle each sheet with a bit of semolina flour before loosely rolling it up across its length into a long log. Moving across its short side, cut into strips as wide or narrow as you please, then unfurl the newly-cut noodles and shake them out to avoid them sticking. At this point, you can hang them up or twist them into loose nests to air dry.
If you have a spaghetti cutter attachment for your pasta machine, use it to roll your dough out into thin noodles. Sprinkle a bit of semolina flour onto each bundle before hanging or forming into nests to dry.
PART 2: GREEN ONION AGLIO E OLIO
1. Place a large pot of water on high heat and leave to come to a boil.
2. Next, place a sauté pan or frying pan large enough to accommodate your cooked pasta on medium-high heat. Once the pan is hot, pour in enough extra virgin olive oil to generously cover its bottom.
3. Roughly slice and chop 4 or 5 cloves of garlic and add them to the hot oil. Season the garlic and oil with a pinch of fine or flaky sea salt. You don't want the garlic to burn, so keep an eye on it and stir occasionally, adjusting the heat if necessary.
4. Once the pot of water has come to a boil, season it with coarse salt and add in enough fresh pasta for two (about half of the recipe). Swirl the water around to stop any noodles from sticking at the bottom of the pot, and cook for 2-3 minutes*.
5. While the pasta cooks, trim the roots off your green onions and slice each one from top to bottom into three or four long strips. Add them to the pan with the garlic and oil.
6. Once the pasta has cooked, transfer it directly to the pan along with a bit of pasta water. Toss it through the garlic and green onions with a pair of tongs until each noodle is evenly coated in the sauce (you may want to add a bit more pasta water if the noodles are looking dry), and the green onions have wilted and turned bright green.
7. Top with freshly ground black pepper and serve immediately.
*if you are using a different pasta or one that is not fresh, cook it according to its own timing or package instructions and don't start cooking the garlic in oil until your pasta only has a few 2-3 more minutes of boiling left
note: a lot of pasta-making is best learnt by watching others do it (rather than reading about it), so if you feel you need a bit of visual aid, you're not alone! I highly encourage anyone interested in making fresh pasta to check out these really helpful videos from Giuliano Hazan on making and kneading pasta dough, rolling it out, and cutting it by hand.
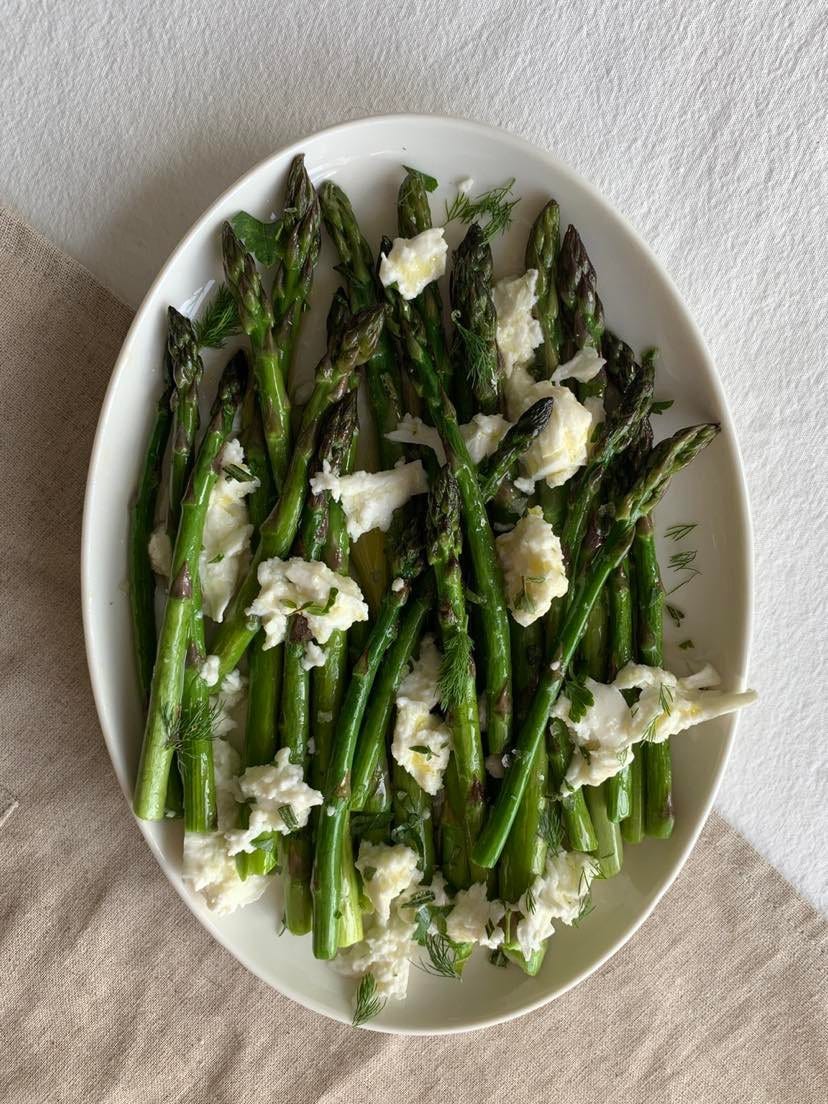
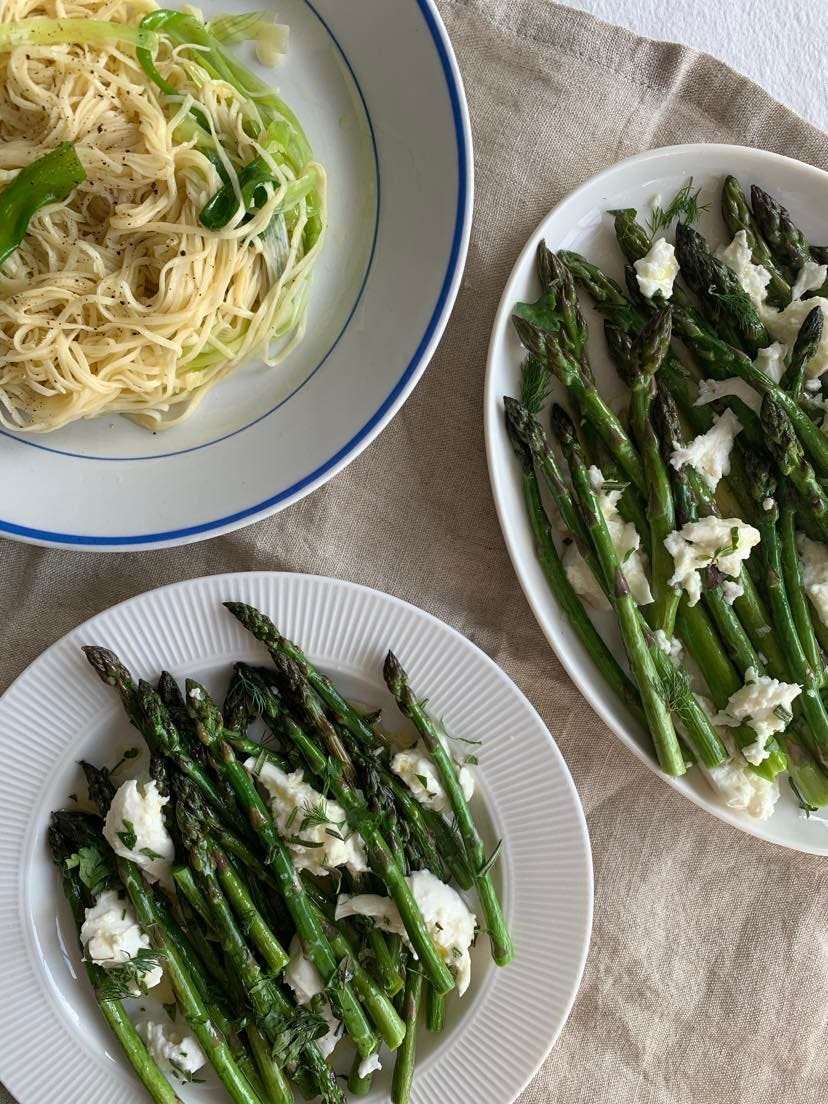
Pairs fantastically well with sautéed greens, like the asparagus pictured above. If you want to make it too, you can watch me make the whole meal over here!
food for free!
getting more out of the grocery store 🌿
It can sometimes be easy to overlook the fact that supermarkets sell seeds. While some grocery stores actually do carry those ready-to-plant gardening packets, what I'm referring to here are simply the whole foods they sell – which, despite being full of seeds (like bell peppers and melons) or actually being a seed (like quinoa and lentils), are not often thought of as such.
Now, before you start planting every seed, bulb and tuber you bring home from the grocery store, I should tell you that planting seeds from store-bought ingredients is not necessarily guaranteed to help you stretch out your food dollars (or whatever your local currency may be).
Some things like popcorn kernels or sprouting potatoes should work in theory, however the corn used in popcorn kernels doesn't taste all that great fresh, and the potatoes from the grocery store are often prone to disease. And that's if you even get them to grow in the first place!
Having said that, some things are certainly worth the shot if you've got room to grow a plant or two.
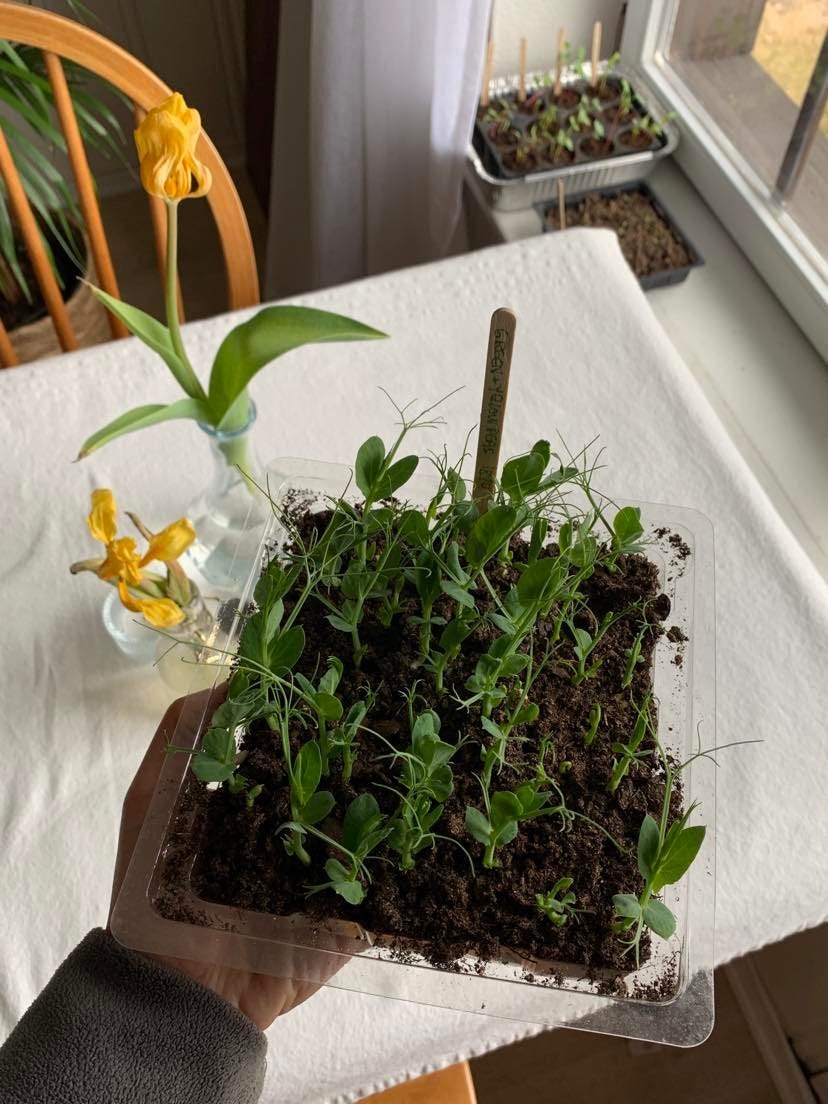
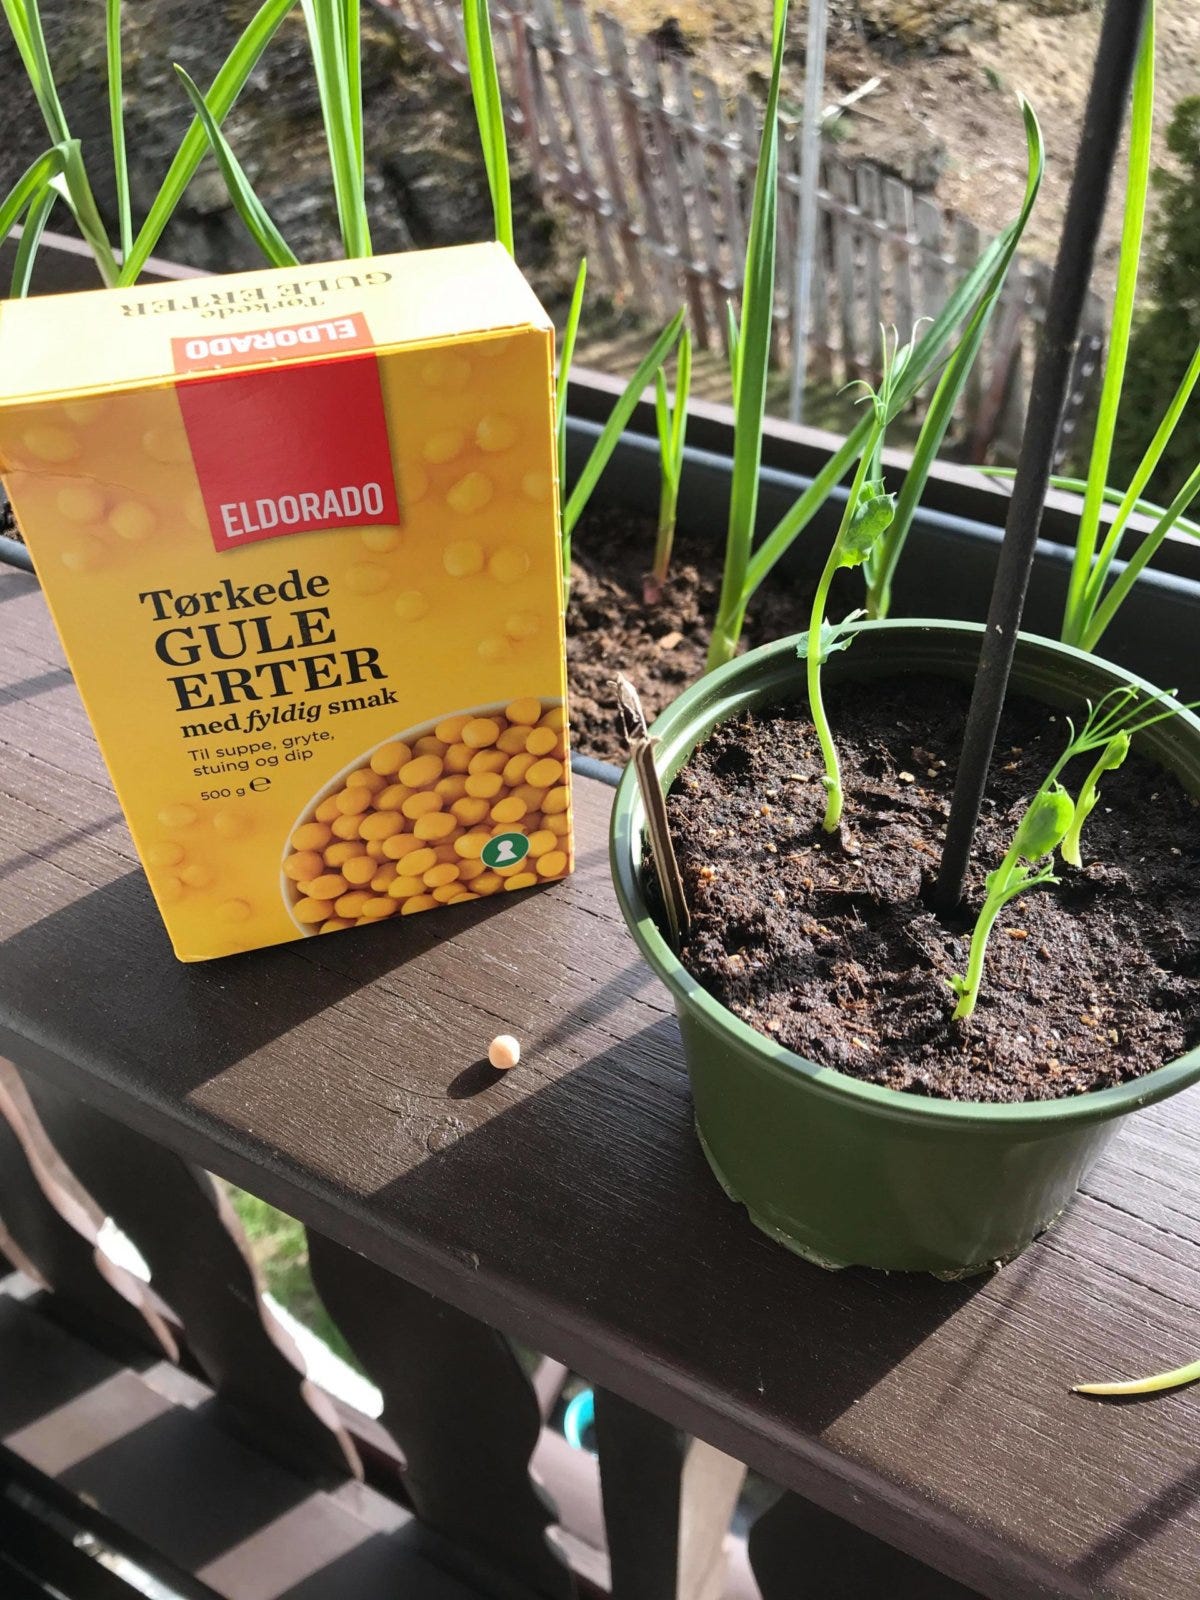
One of the earliest vegetables you can sow – that also happen to be relatively easy to grow – are peas. They also grow incredibly quickly (especially if you're simply looking to harvest the shoots). You might be surprised to find that the whole dried peas in your cupboard can be planted! All you have to do is soak them for 24 hours first. At worst, nothing grows. At best, you just got more food out of your food.
Another great thing to plant is garlic (can you spot it behind the peas above?). One clove has the potential give you a whole new bulb, and even the young green leaves and curly scapes they shoot up are absolutely delicious.
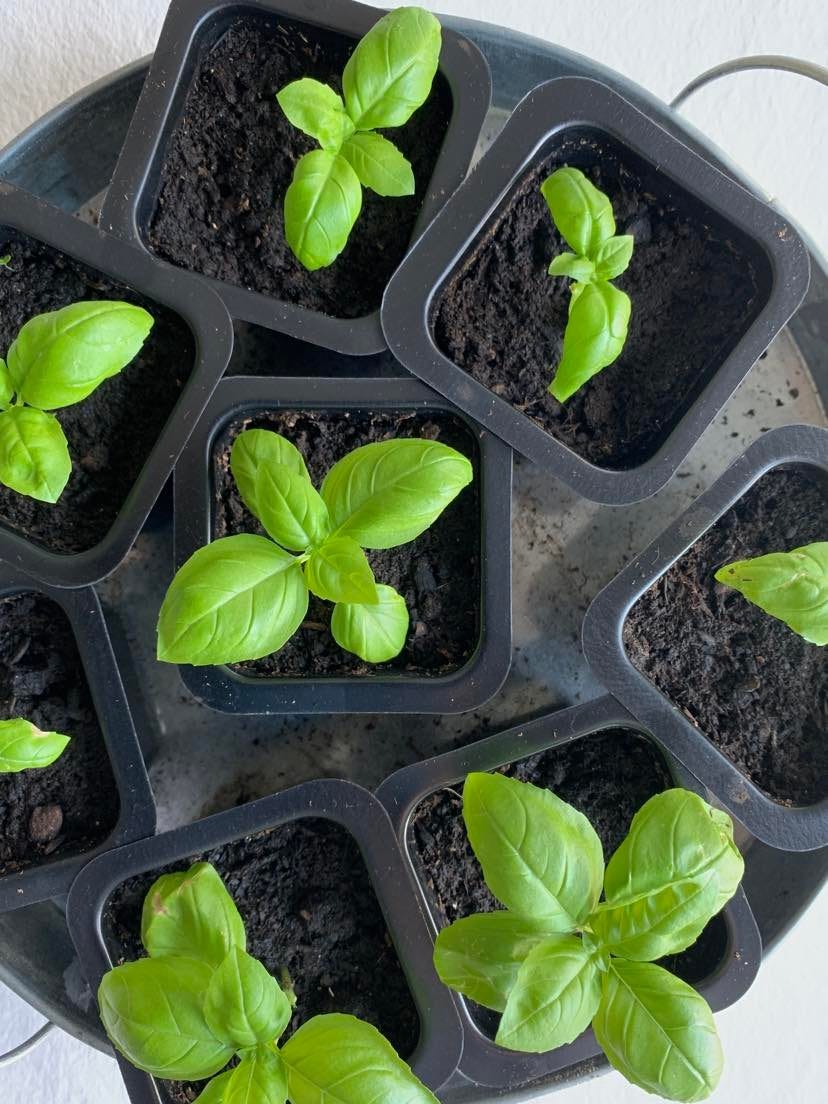
Now, if planting seeds isn't really up your alley (too slow to grow!), you may also want to consider taking cuttings from grocery store plants. Basil, for example, if sold in pots, can quickly become a whole lot more basil for a fraction of the cost. If you have no clue how to start, this video will tell you all you need to know (it certainly helped me).
While certainly no expert on the matter, my advice when it comes to growing from grocery stores would be to plant from things you would have bought anyway — that way you can treat the experience as a fun experiment and not get too disappointed if things don't work out.
If, however, all you're looking for are reliable seeds and a more diverse range of plant varieties, then the garden centre is still the place to go. There's no shame in trying both ways, though, and that's exactly what I've been doing.
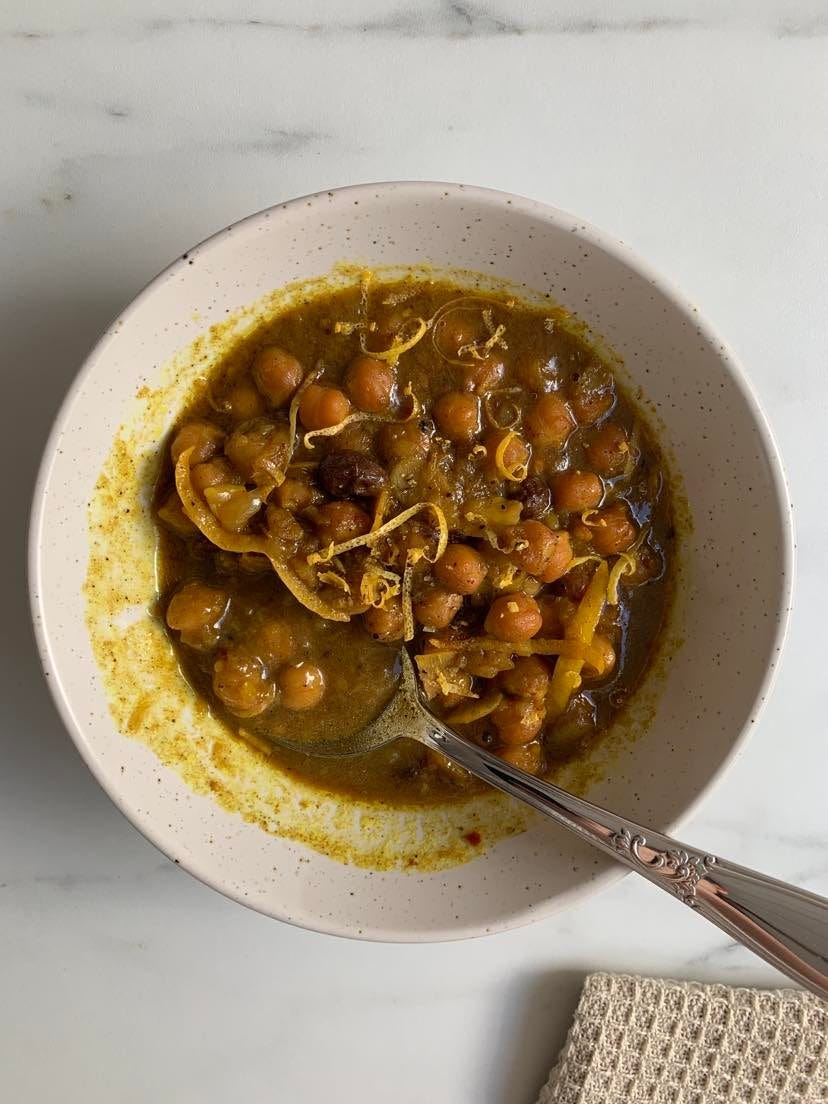
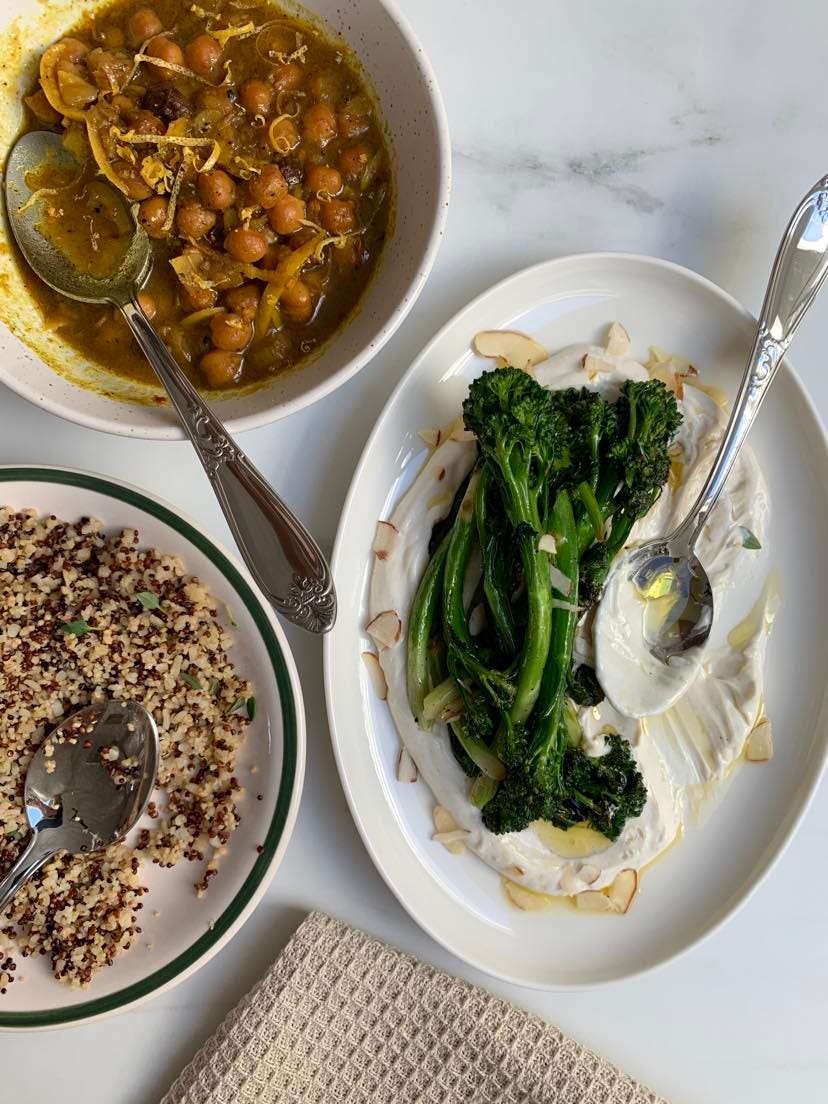
a zesty chickpea tajine
🍋
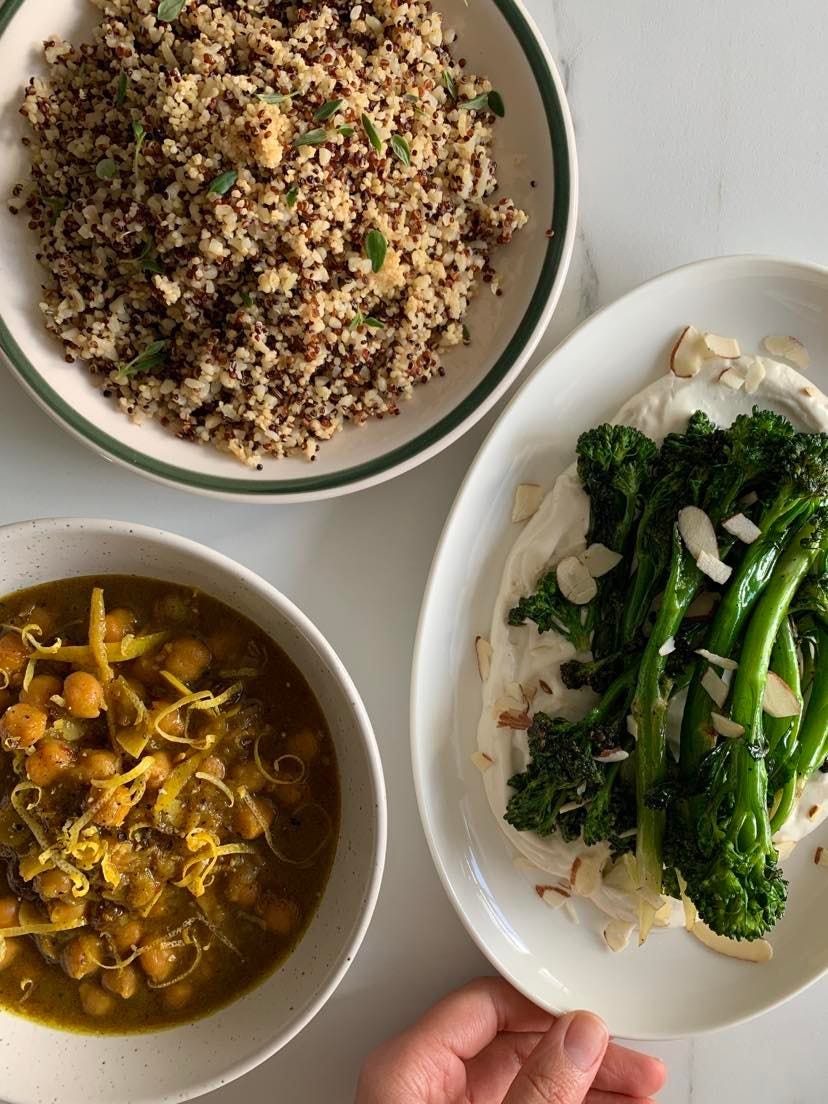
This dish has become such a go-to when I'm not sure what to cook and don't want to spend much time in the kitchen. The meal practically cooks itself and, yet, I am always foolish enough to barely make enough for leftovers the next day, when it tastes even better after a night spent in the fridge.
Don't be like me. Double the recipe.
•••
A ZESTY CHICKPEA TAJINE
serves two, paired with a cooked grain and some roasted or sautéed veg
INGREDIENTS
• 1 white or yellow onion, peeled
• extra virgin olive oil
• 4 tsp fresh ginger, grated or minced you can use 1 tsp ground ginger if that's what you have, or a combination or fresh and dried
• 2 tsp fresh turmeric, grated or minced you can use 1 tsp powdered ginger if that's what you have, or a combination or fresh and dried
• 1 tsp paprika
• 1 tsp chili flakes
• 2 tsp cinnamon
• 1 can or box of chickpeas, aquafaba and all mine contained 290g total
• ¼ tsp of saffron threads
• 1-2 Tbsp raisins depends on how much you like 'em
• 0.5L vegetable stock, or freshly boiled water + a vegetable stock cube
• strips of lemon peel from a ½ lemon
• 1 heaped Tbsp slivered almonds
• lemon zest or lemon curls from a ½ lemon
• the juice of a ½ lemon
• 1 small tsp of honey
• sea salt
• freshly cracked black pepper
METHOD
1. Start by setting a medium-sized saucepan or pot on the stove and turning the heat up to medium. While it heats up, finely chop your onion.
2. Once the pot is hot, drizzle in just enough olive oil to barely coat the bottom. Add in the onion and cook, stirring occasionally, until the onion is tender and translucent.
3. Next, add in most of the spices: the 4 tsp fresh minced ginger (1 tsp dried), 2 tsp fresh minced turmeric (1 tsp dried), 1 tsp ground paprika, 1 tsp chili flakes, and 2 tsp cinnamon. Season with salt and a generous amount of black pepper.
4. Pour the entire can of chickpeas into the pot, along with its cooking liquid, and stir through. Add in the ¼ tsp of saffron threads and 1-2 Tbsp raisins before pouring in the 500mL of vegetable stock. Give everything a good stir, then leave to bubble away without a lid until the liquid has reduced back to its pre-stock level and thickened up, about 45 minutes.
5. Once the stew has simmered down to the desired consistency, add in the strips of lemon peel (from ½ a lemon) and 1 Tbsp of slivered almonds, as well as a squeeze of fresh lemon juice from ½ lemon and a small teaspoon of honey. Stir through then serve hot, and top each serving with fresh lemon zest or lemon curls.
If serving with grains, I highly recommend seasoning them with freshly crushed cumin and coriander seed and, once cooked, topping them with fresh coriander, parsley and/or thyme. Couscous and/or bulgur are personal favourites for absorbing the tajine's flavourful juices.
the final note
🎵
Whether you're spending hours at a time sowing and transplanting seeds, or making the most of the warmer weather to throw open the windows and give everything a bit of a tidy — both of which I've been doing recently, I am a rather new convert to spring cleaning (I recently emptied out every single cupboard and drawer in the kitchen, fridge included, and deep-cleaned their insides before only putting back in what needed to stay, in a very organised way. it was oh so satisfying) — here are few things you may want to listen to while you get busy.
•••
First: a few podcast episodes for anyone who's into growing, cooking or eating food. I also like to listen to food-related podcasts in French and Norwegian, so do let me know if you want to exchange some non-English language recommendations!
Second, these playlists (made by moi) have brought me a fair bit of joy over the last month or two. Maybe they'll do the same for you!
classic cosy — the perfect backdrop to any cosy activity
mood for food — catchy old tunes with food-related titles
60s french — french hits that'll transport you straight to the 1960s
surprise swedish — songs you've probably heard, but never guessed were by Swedish artists

That's all from me for this newsletter!
Happy gardening, cooking and listening 💛

This was a Substack edit of an archived newsletter. To read the newsletter in its original format, click here.